Users and Roles
Users is where administrators add people and control what they can do. It sits under the Administration section of the sidebar and is only available to users at the main store whose role includes user management.
The screen has two tabs: Users and Roles.
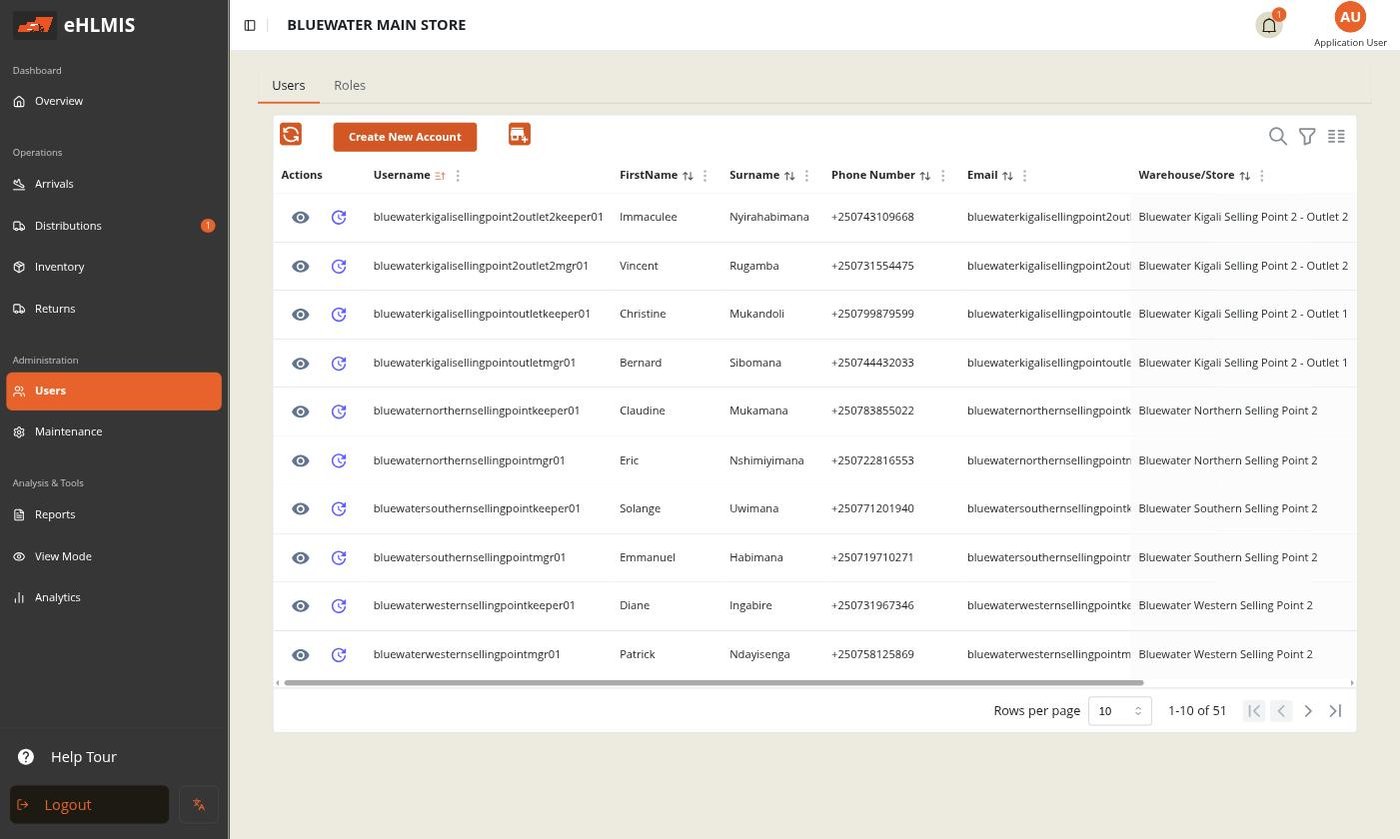
The Users tab
A table of every account, with columns for Status (Active / Inactive), Username, Warehouse/Store, First Name, Surname, Phone Number, and Email. Use the search box and the per-column filters to narrow a long list; it pages 10 at a time.
Each row has two actions at the left:
| Icon | Opens |
|---|---|
| 👁 View | The User Profile dialog — read-only details plus the active toggle and role |
| ✎ Update | The Update User dialog — edit the person's name, contact details, and store |
Creating a user
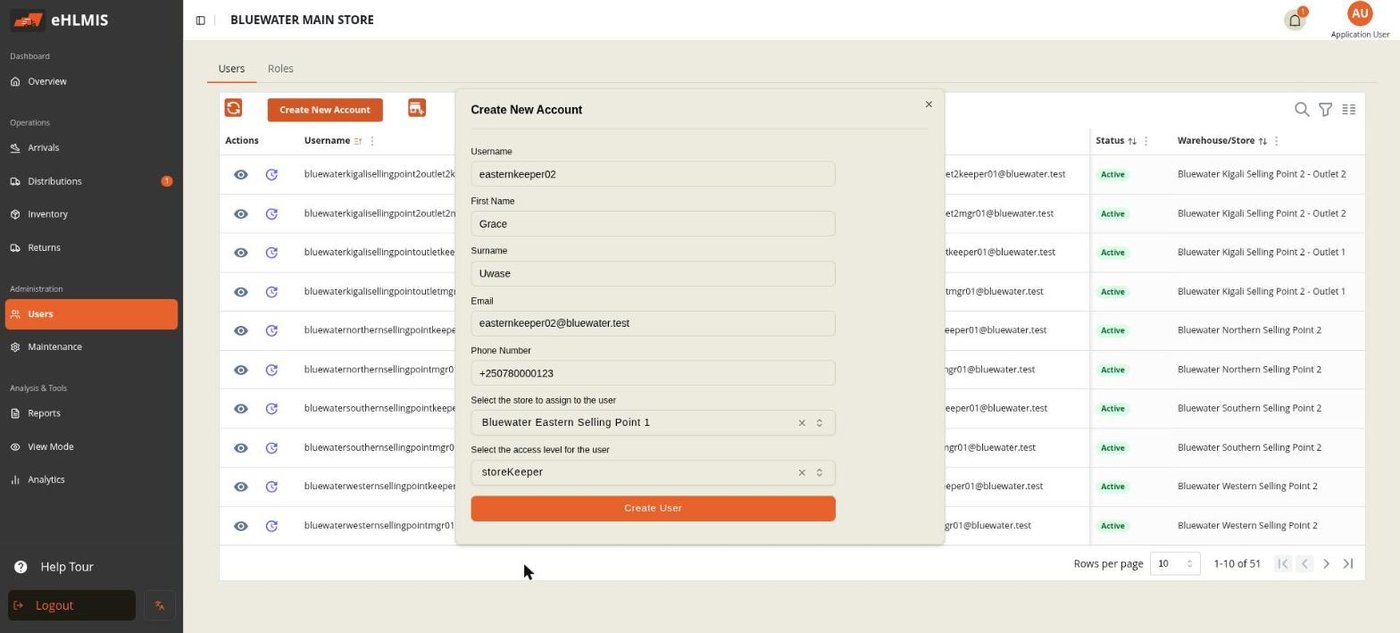
- Click Create New Account.
- Fill in Username, First Name, Surname (each at least two characters). Email and Phone Number are optional.
- Select the store to assign to the user — the one store this person works in. Everything they see in the app is scoped to it.
- Select the access level for the user — their role (see Roles below).
- Click Create User.
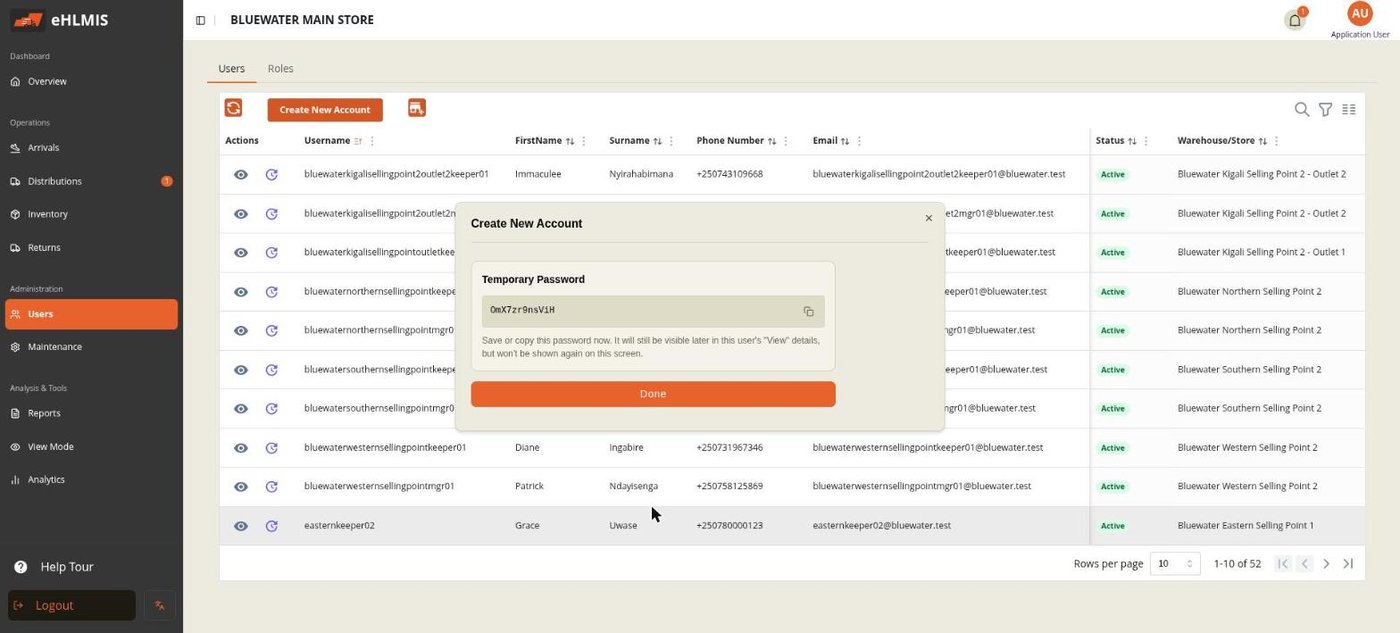
The system generates a temporary password and shows it once, with a copy button. Copy it and pass it to the person securely — they sign in with it directly (there is no forced password change).
When HLMIS runs against DHIS2, Create New Account first asks for a DHIS2 username and a Next button; it validates the name against DHIS2, shows the matched person's details, and creates the HLMIS account from them. Store and role are still chosen here.
Editing, deactivating, and passwords
- Update (✎) changes name, email, phone, and store. The username cannot be changed.
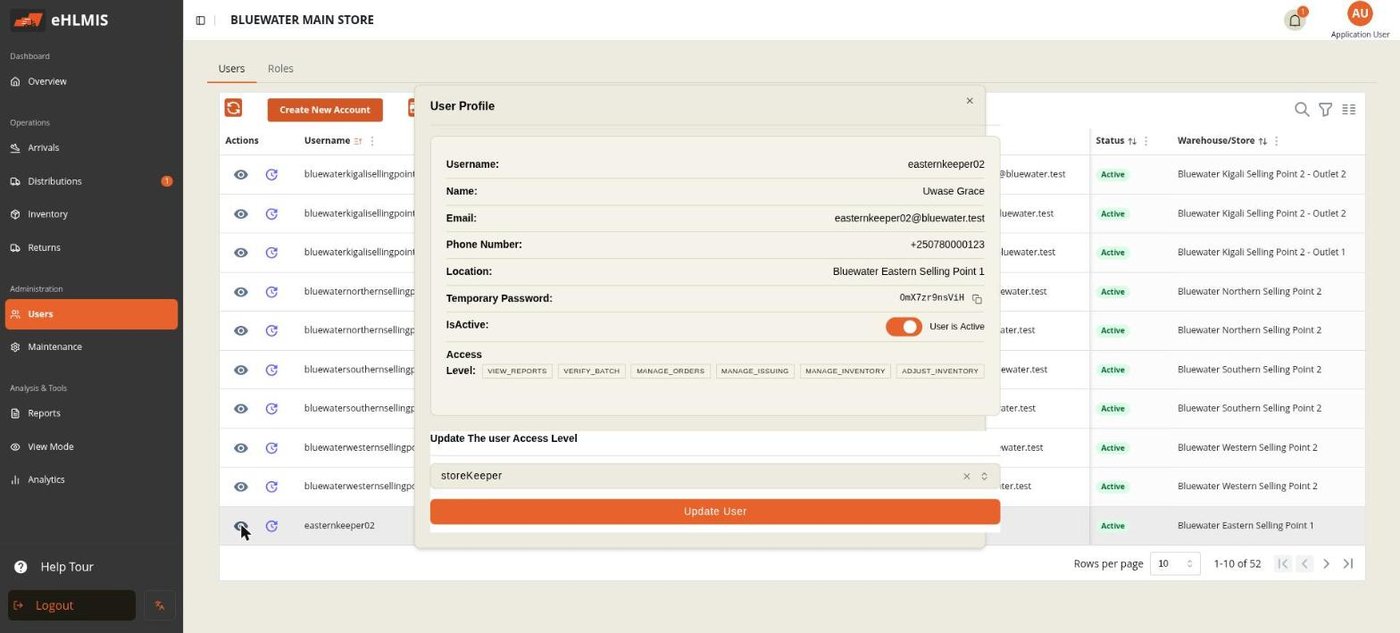
- View (👁) → User Profile shows everything, including the temporary password (still copyable here until the person is given a new one) and the person's permissions. The Is Active toggle on this dialog, followed by Update User, deactivates or reactivates the account — a deactivated user cannot sign in. Accounts are deactivated, never deleted.
- Changing someone's role: on the User Profile dialog, under Update the user access level, pick a new role and click Update User.
- Password reset: there is no self-service password change. To give someone a new password, an administrator re-issues one (the temporary password on the User Profile view is what they use).
The Roles tab
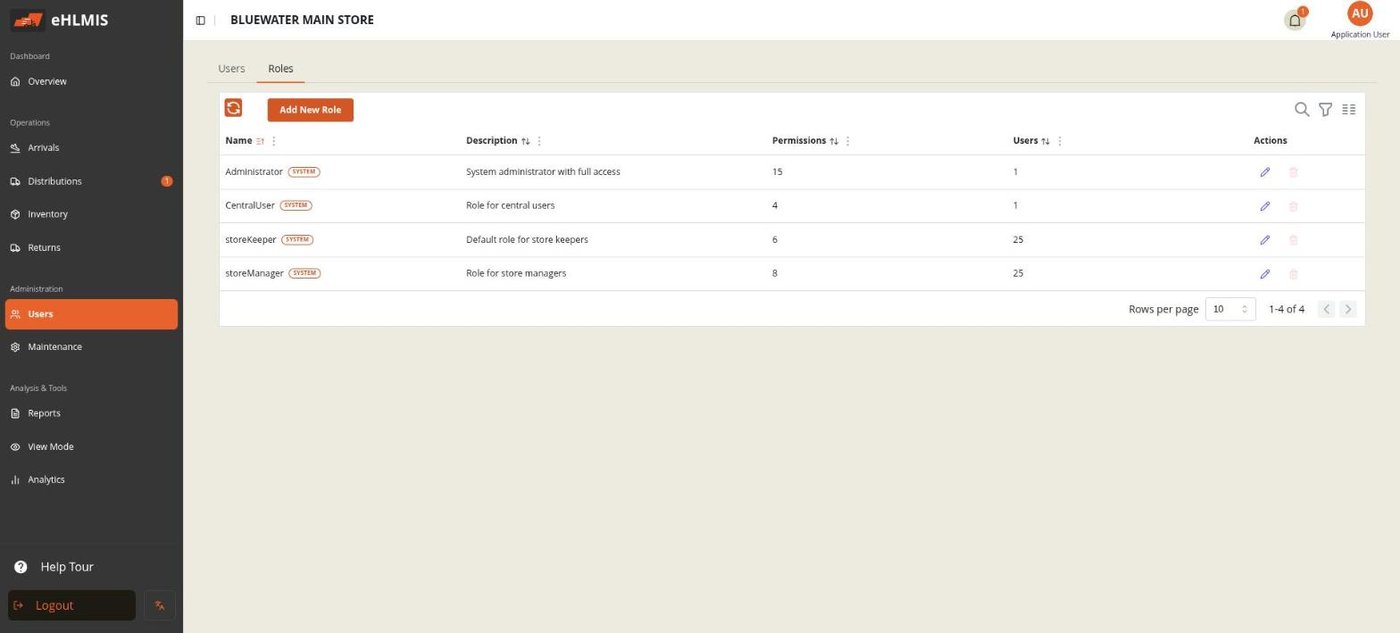
A role is a named set of permissions. Every user has exactly one role, and that role decides which menus and actions appear for them.
The four built-in roles
These are marked SYSTEM — they cannot be renamed or deleted, but you can adjust their permissions.
| Role | Typical use |
|---|---|
| Administrator | Full access, including Users, Roles, Locations, Products, Configuration. Assigned only at the main store. |
| CentralUser | A central/head-office user — receiving arrivals, viewing reports across stores. |
| storeManager | Runs a store: approves incoming requests, distributes stock, issues, adjusts inventory. |
| storeKeeper | Day-to-day store work: places requests, receives deliveries, dispenses, counts stock. |
Creating a custom role
-
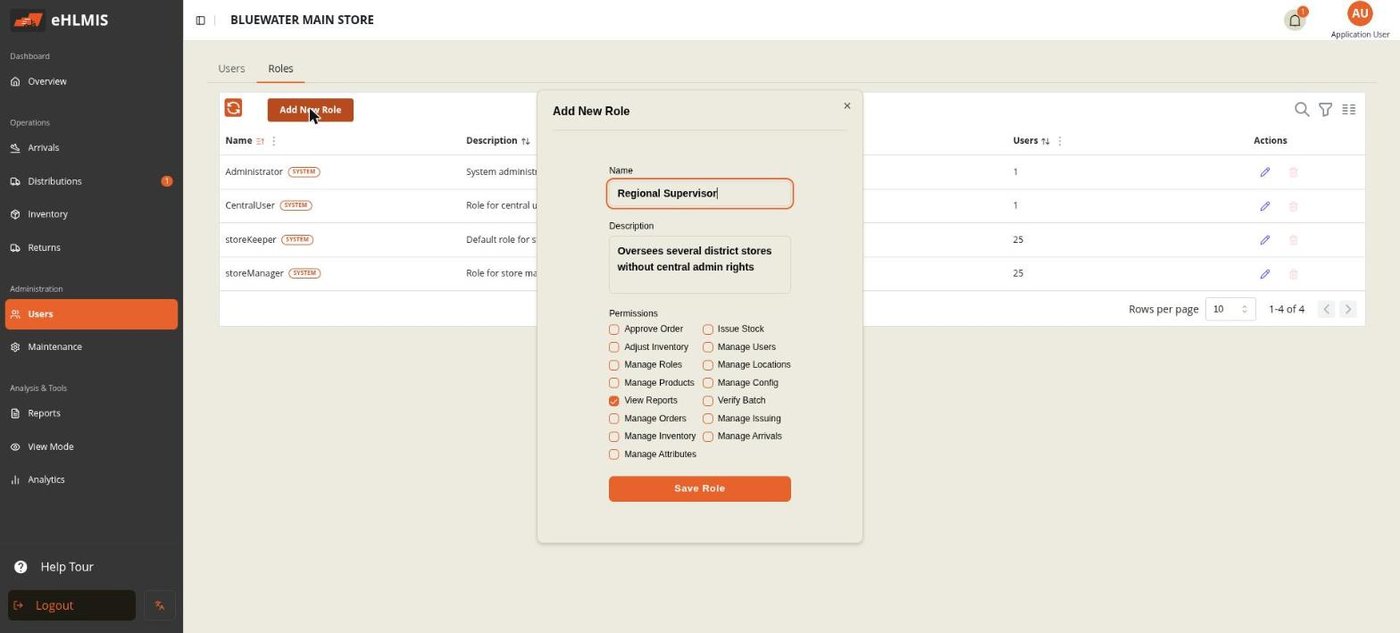
On the Roles tab, click Add New Role.
-
Give it a Name and an optional Description.
-
Tick the permissions it should have (at least one). The full list:
Permission What it unlocks Manage Arrivals The Arrivals screen Manage Orders Requisitions, Distributions, Returns Approve Order Approving requisitions Manage Issuing The Issuing screen Issue Stock Recording issued/dispensed stock Manage Inventory The Inventory screen Adjust Inventory Stock counts and adjustments Verify Batch Batch verification during receiving View Reports The Reports screen Manage Users Adding and editing users Manage Roles Adding and editing roles Manage Locations Adding and editing locations/stores Manage Products Products, product types, suppliers Manage Attributes Custom fields Manage Config The Settings screen -
Click Save Role. It is now selectable when creating or editing a user.
To change a role later, use the ✎ action on its row; 🗑 deletes a custom role (you are asked to confirm). System roles cannot be deleted.
Why administrator roles are main-store only
HLMIS will not let you assign a role that includes Manage Users to a user whose store is not the main store. Central administration stays central — this is enforced by the system, not just convention. If you need someone at a branch to manage part of the operation, give them a custom role with the specific permissions they need (for example Manage Locations and Manage Products) but not Manage Users.