Returns
A return sends stock you are holding back up the hierarchy — to the store you normally requisition from. Use it for stock you no longer need, was over-supplied, or is close to expiry and better held centrally.
(A shortage on a delivery you are receiving is not a return you raise by hand — see Shortfalls.)
The Returns screen is available to users with the Manage Orders or Manage Issuing permission, and has four tabs: New Return, Pending OUT/Return, Pending IN/Return, History.
Sending a return (initiating store)
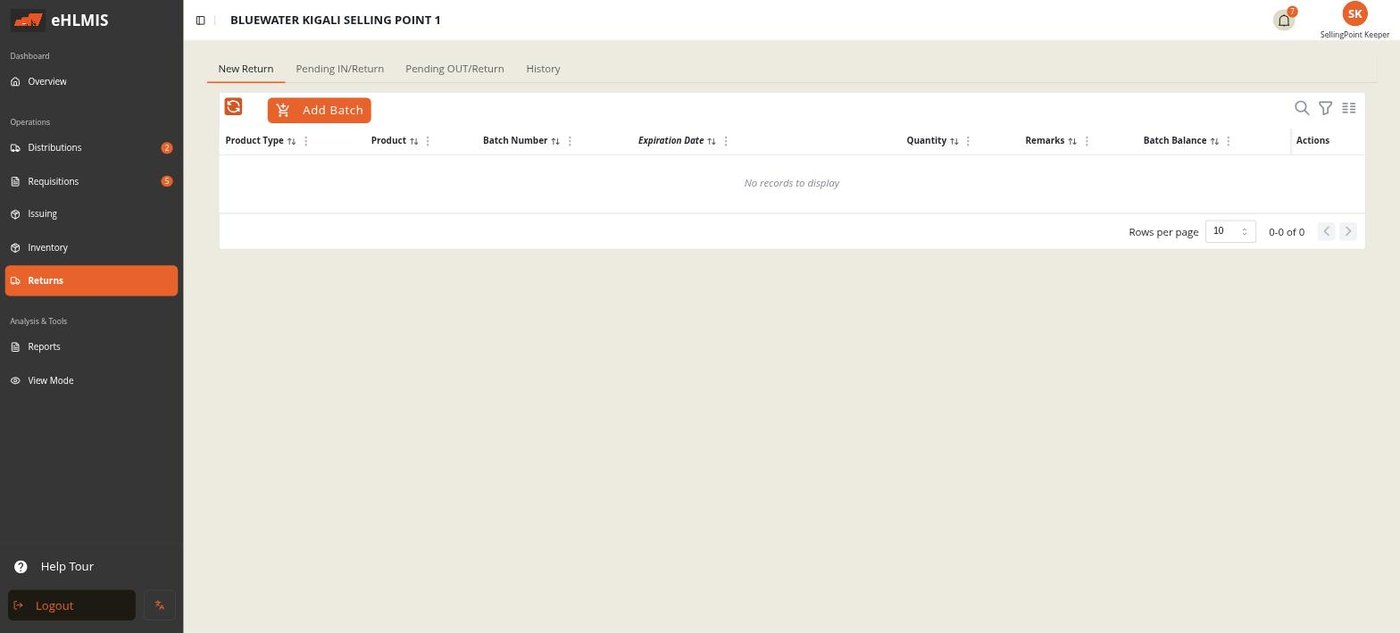
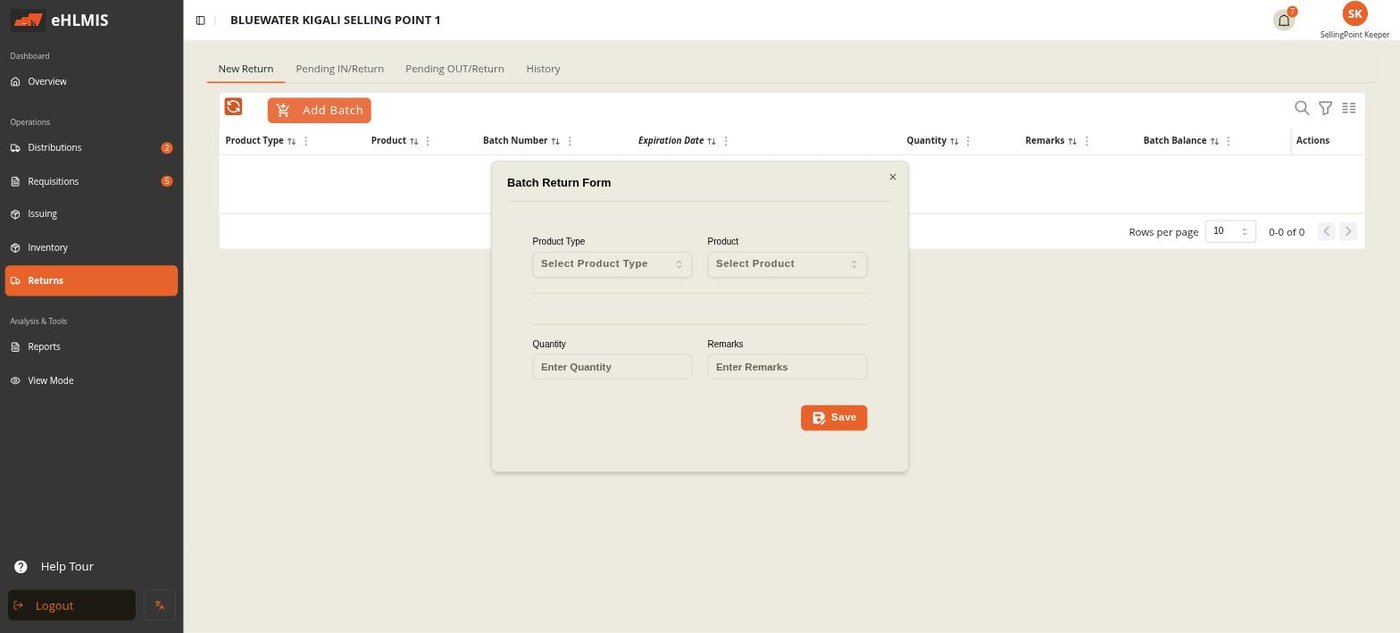
- On New Return, click Add Batch. Choose the Product Type, Product, and the specific Batch you are returning, and the Quantity. Repeat for each batch.
- Review the lines. Remove any you added by mistake.
- Click Confirm and Send. The return goes to your parent store and moves to your Pending OUT/Return tab.
Pending OUT/Return lists the returns you have sent that the parent store has not yet acknowledged. Nothing has left your balance yet at this point.
Receiving a return (parent store)
Returns sent to you by the stores below you arrive on the Pending IN/Return tab. Expand the return and click Acknowledge on its line:
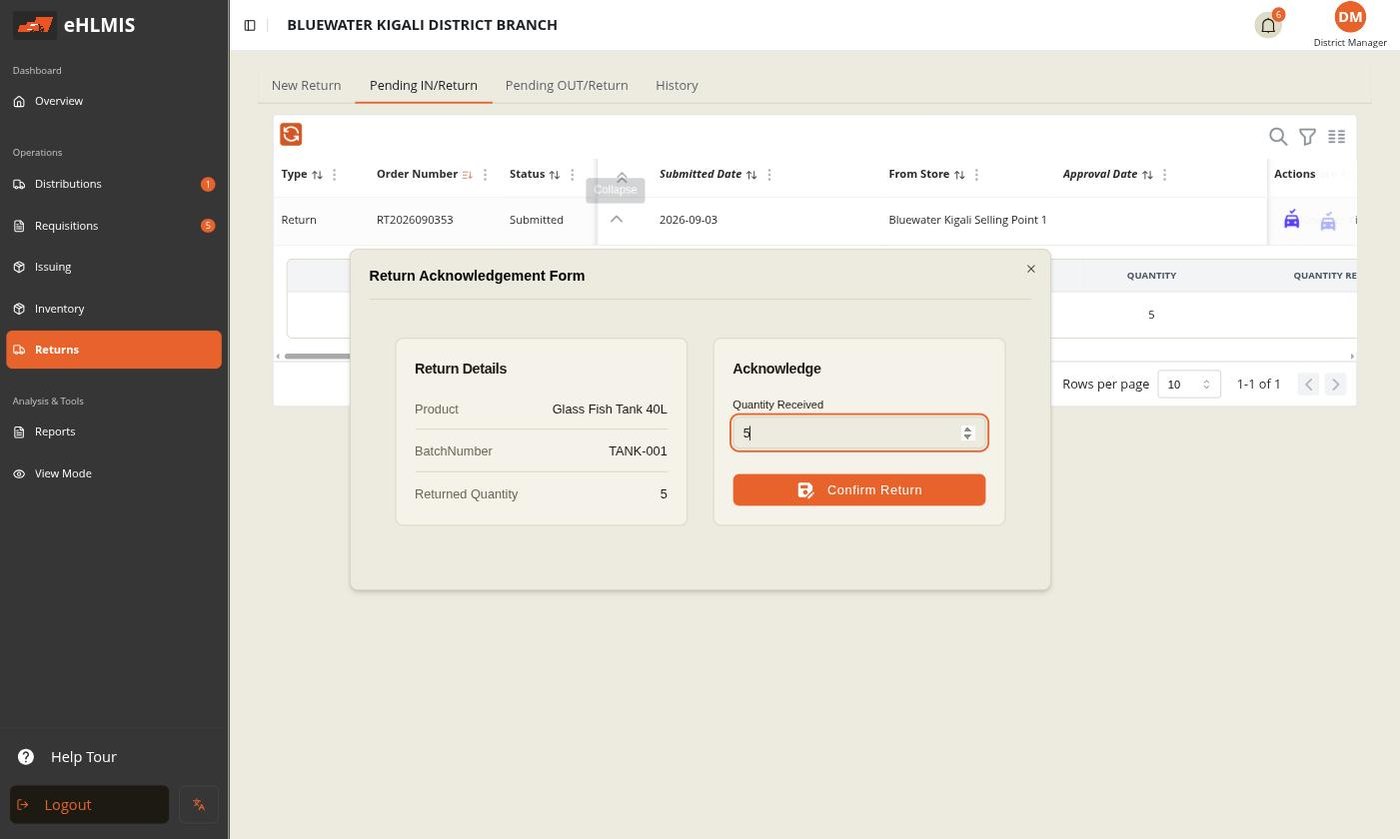
- The form shows the Returned Quantity the other store says it is sending.
- Enter the Quantity Received — what actually arrived. Anything short of the returned amount is recorded as not received.
- Click Confirm Return. This is the point where balances move: the received quantity leaves the returning store and arrives at yours. The return is now Complete.
History
The History tab shows completed returns with their lines, quantities, and dates. A return created automatically from a shortfall also appears here, marked as an automatic return rather than one someone raised.