Locations and Stores
Everything in HLMIS — stock, orders, users, reports — belongs to a location (also called a store). Locations are arranged in a hierarchy with your main store at the top, and stock flows up and down that hierarchy.
You manage them under Maintenance → Locations, available to administrators at the main store.
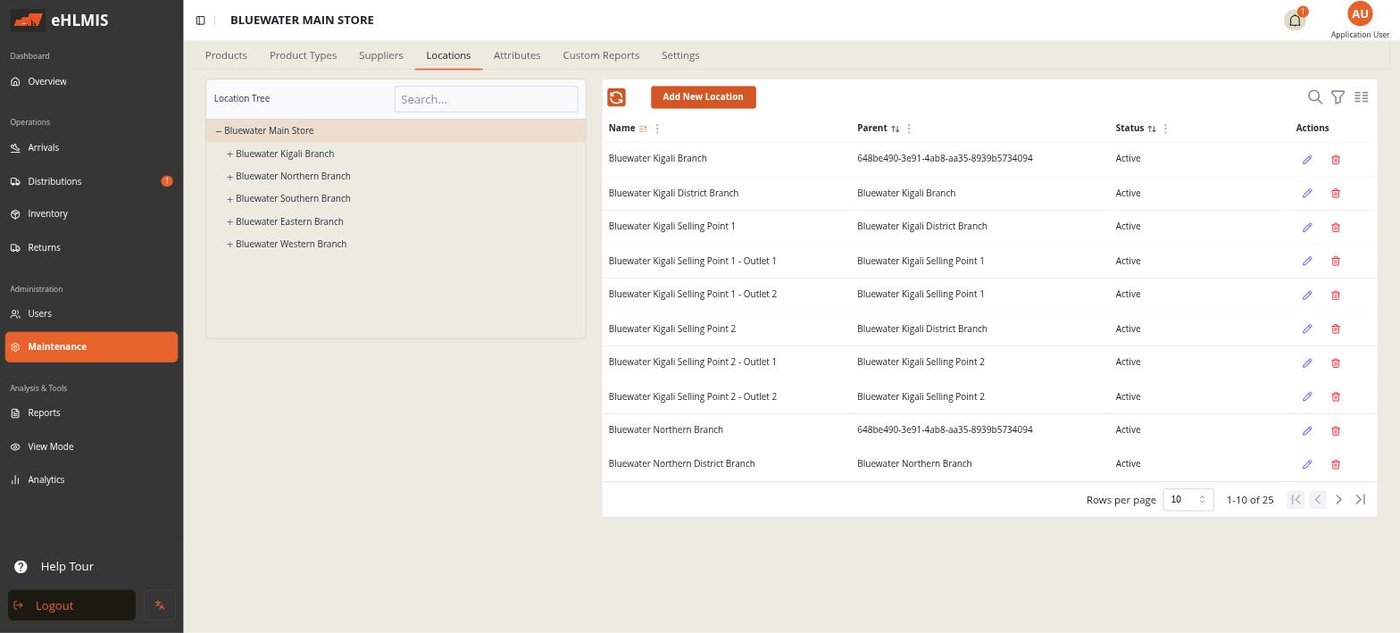
The screen
- Location Tree (left) — your whole network as an expandable tree. Click a node to select it; the table on the right narrows to that branch.
- Locations table (right) — Name, Parent, and Status (Active / Inactive) for each location, with Add New Location above it. (Branches that sit directly under the main store show the main store's internal ID rather than its name in the Parent column — a small display quirk; the tree on the left shows the relationship clearly.)
The hierarchy
Each location has one Parent, except the main store, which has none. A location's parent determines:
- where it sits in the tree, and
- who it trades stock with — a store sends requisitions up to its parent, and distributes stock down to its children. A facility that reports to a district store requests from that district store; the district store requests from its regional branch; and so on up to the main store.
For example, in the Bluewater network:
Bluewater Main Store
└── Bluewater Kigali Branch
    └── Bluewater Kigali District Branch
        └── Bluewater Kigali Selling Point 1
            ├── Bluewater Kigali Selling Point 1 - Outlet 1
            └── Bluewater Kigali Selling Point 1 - Outlet 2
Selling Point 1 requisitions from the District Branch and distributes to its two Outlets.
Adding a location
- Click Add New Location.
- Enter a Name.
- Choose its Parent. If you leave the parent blank it is placed directly under the main store.
- Click Save Location.
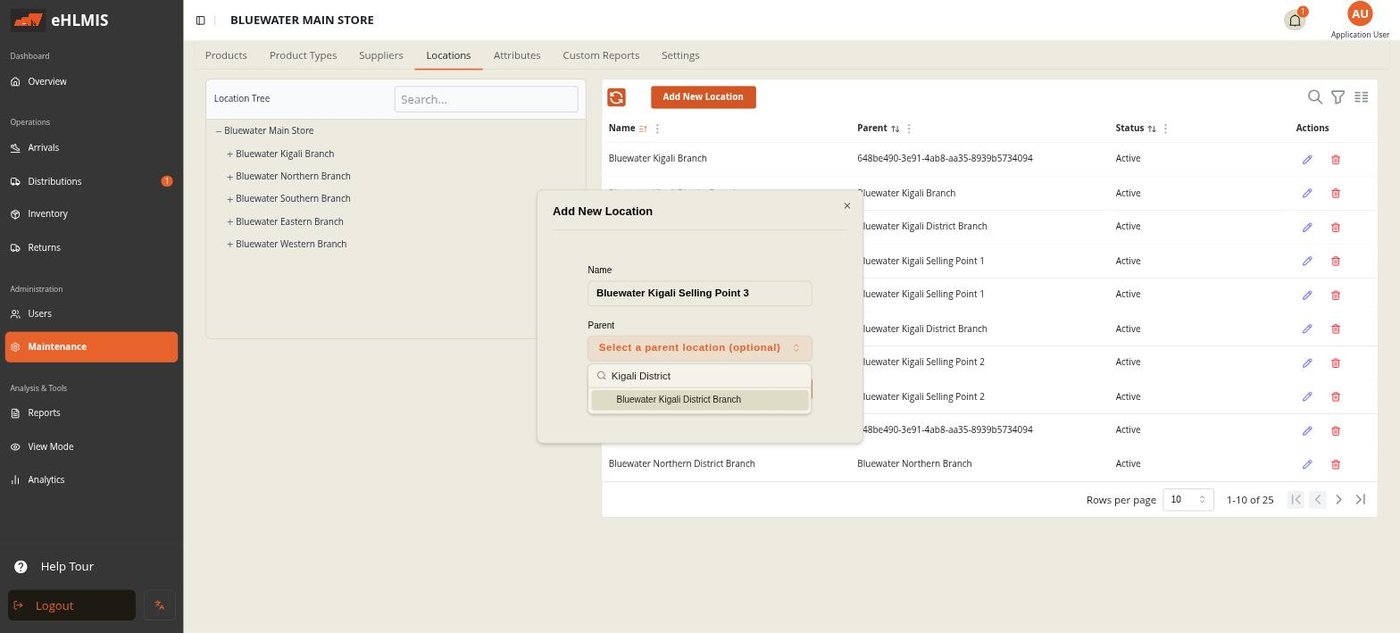
Editing, moving, and deactivating
Each row in the table has actions:
| Action | Effect |
|---|---|
| ✎ Edit | Rename the location, or move it by changing its Parent. You cannot make a location its own parent or move it under one of its own descendants. |
| 🗑 Deactivate | Marks the location inactive after a confirmation. Inactive locations stay in the records but are hidden from day-to-day pickers. |
| ↺ Reactivate | Brings an inactive location back (shown in place of the deactivate action on inactive rows). |
The main store cannot be given a parent — when you edit it, there is no
Parent field. You can rename it here (for example, changing the default
Location01 to your organisation's name).
Assigning users to a location
A user works in exactly one location, set when the account is created or edited — see Users and Roles. To move someone to a different store, edit their user record, not the location.
When HLMIS is synced with DHIS2, locations come from DHIS2 org units and this tab is read-only — you cannot add, rename, move, or deactivate them here. Changes are made in DHIS2 and pulled in on the next sync. In that mode a location's position in the org-unit tree and its position in the supply chain can differ; in a standalone deployment they are always the same.