Getting Started
This page covers signing in, finding your way around the screen, and how your role decides what you can see and do.
Signing in
Open the app's address in a browser. You will land on the sign-in screen.
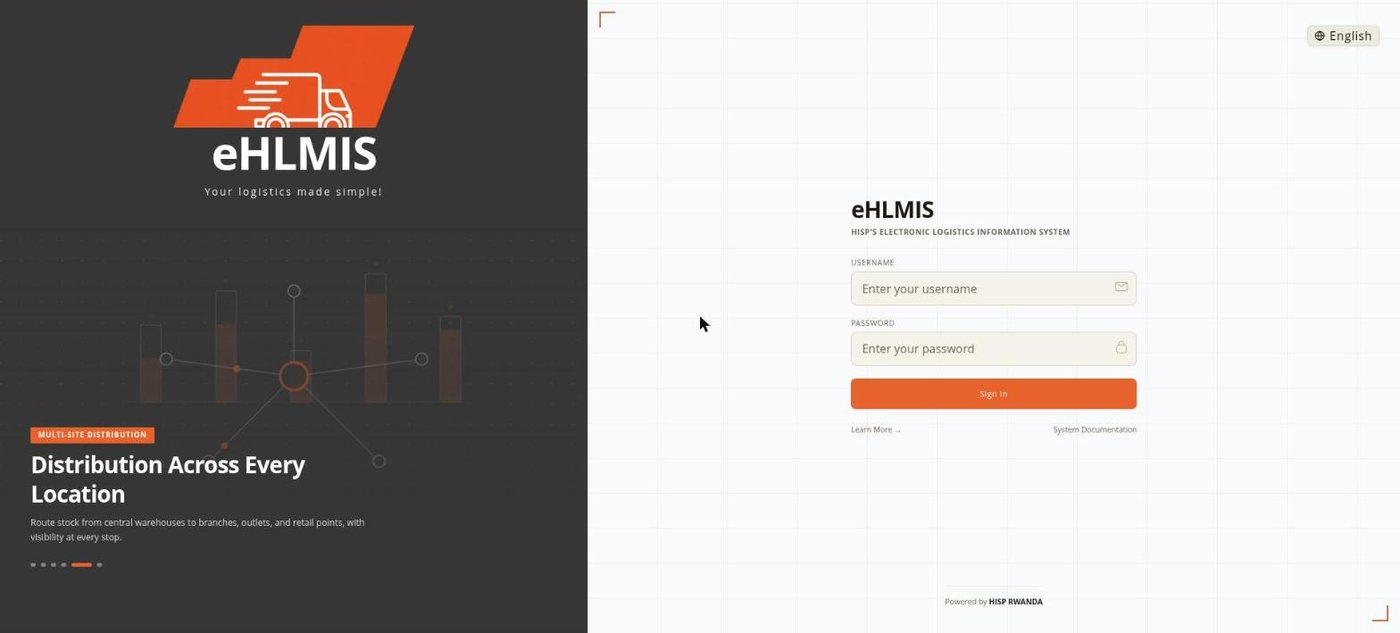
- Enter the username and password an administrator gave you.
- Use the eye icon in the password box to check what you have typed.
- The language selector is at the top right — English, French, Arabic, and Kinyarwanda are available, and your choice is remembered on this browser.
Your password is issued by an administrator. There is no "forgot password" or self-service password change in the app today — if you are locked out or need a new password, ask an administrator, who can re-issue one from the Users screen.
If you are setting HLMIS up for the first time, start with First-Time Deployment Setup instead — there is a one-time wizard to complete before the app can be used.
The main screen
After signing in you see the Overview dashboard.
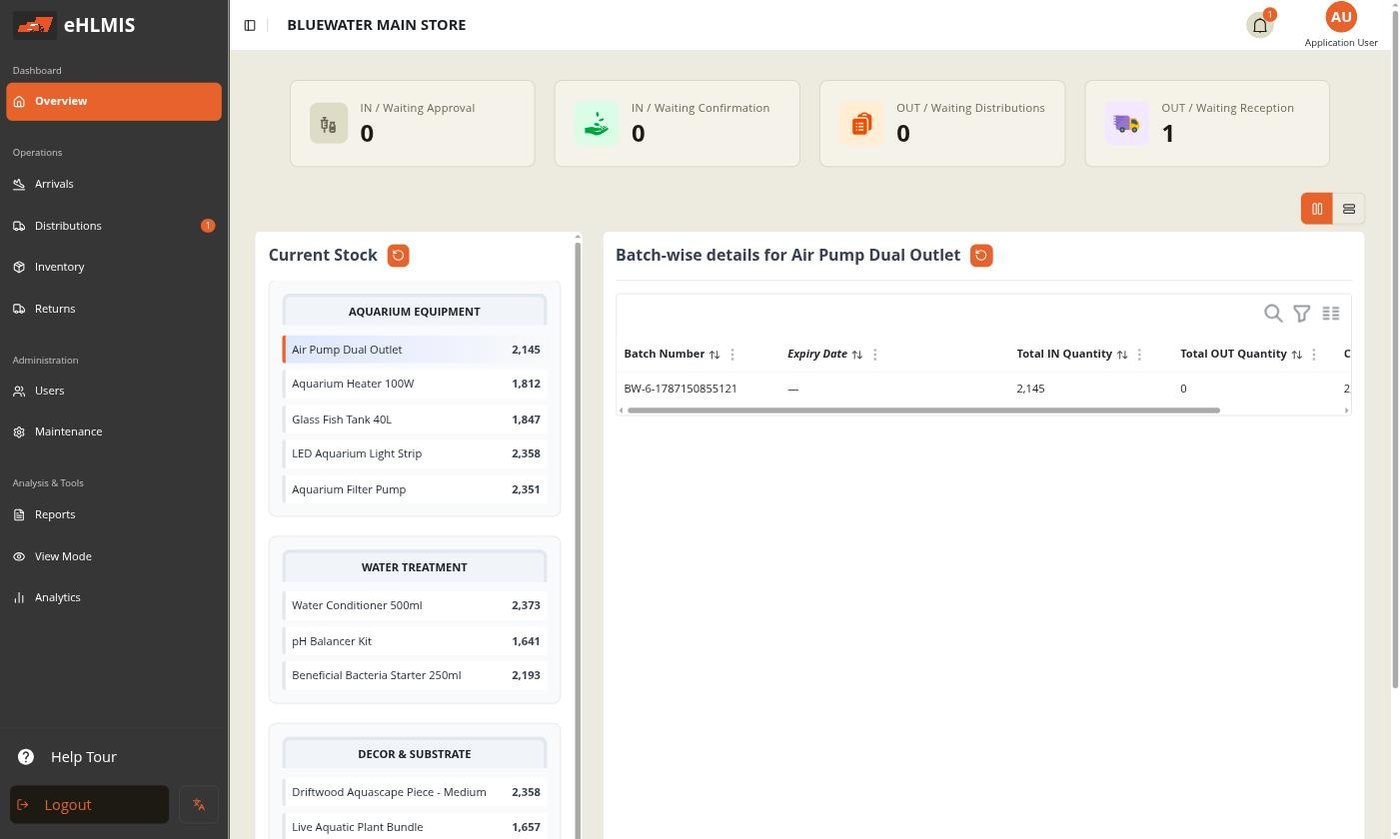
- Left sidebar — your menu. It is grouped into Dashboard, Operations, Administration, and Analysis & Tools. Only the items your role allows are shown (more on this below). The toggle at the top of the header collapses the sidebar to icons.
- Header — shows the store you are working in (in capitals, e.g. BLUEWATER MAIN STORE), a notifications bell with an unread count, and your name and initials. Clicking your name opens a small card with your role.
- Overview content — four summary tiles across the top (IN / Waiting Approval, IN / Waiting Confirmation, OUT / Waiting Distributions, OUT / Waiting Reception) count the orders that need attention at your store, and below them Current Stock lists what you hold, grouped by product category, with a batch breakdown beside it.
- Help Tour and Logout are pinned to the bottom of the sidebar, next to the in-dashboard language selector.
How your role changes what you see
HLMIS hides everything you do not have permission for — there are no greyed-out menu items, they simply are not there. Two examples of the same Overview dashboard:
| Signed in as | Store | Sidebar shows |
|---|---|---|
| An administrator | Bluewater Main Store | Arrivals, Distributions, Inventory, Returns, Users, Maintenance, Reports, View Mode, Analytics |
| A store keeper | Bluewater Kigali Selling Point 1 | Distributions, Requisitions, Issuing, Inventory, Returns, Reports, View Mode — no Administration section at all |
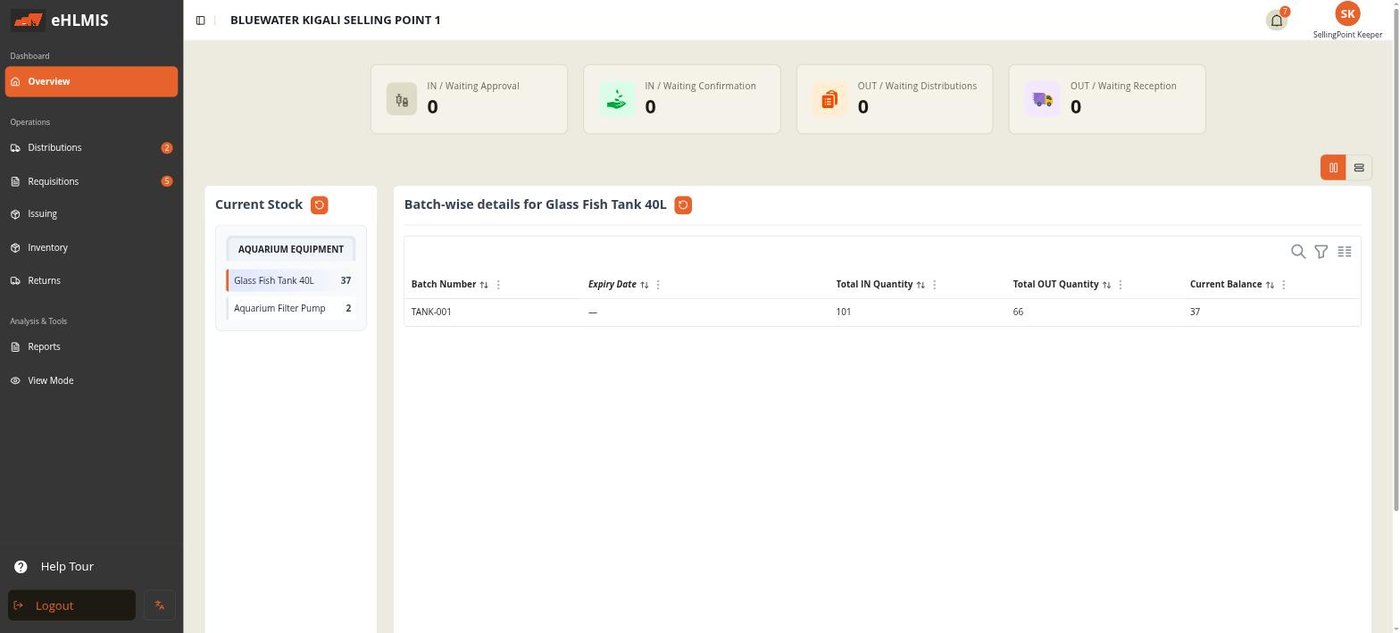
A few menu items also depend on where your store sits, not just your role:
- Requisitions (asking a higher-level store for stock) appears only if your store is not the main store.
- Distributions and View Mode appear only if your store has other stores reporting to it.
- Arrivals appears only for users who can receive incoming shipments (typically at the main store).
The four built-in roles are Administrator, CentralUser, storeManager, and storeKeeper. What each can do — and how to create custom roles — is covered in Users and Roles.
The store you are working in
Every user belongs to one store, shown in the header. All the numbers, stock, and orders you see are for that store. If you need visibility across several stores at once — for example a central or regional manager checking on branches — use View Mode (see Reports); it does not change the store you are signed in as, it just lets you look across the ones beneath you.
Getting help
- Help Tour — the button at the bottom of the sidebar. On screens that have a guided tour it walks you through the main controls step by step; on screens without one it tells you so.
- This manual — linked from the sign-in screen ("System Documentation") and covering every screen in depth.
Signing out
Use Logout at the bottom of the sidebar. Sessions also expire on their own after a period of inactivity, after which you will be asked to sign in again.