Arrivals and Batches
Arrivals is how stock enters HLMIS from outside — a delivery from a supplier into your main store. It is available to users with the Manage Arrivals permission (typically a central user or an administrator at the main store).
The screen has two tabs: Arrivals and Batch Lists. When TRVST verification is switched on (Maintenance → Settings → TRVST), the screen also gains barcode scanning and two more tabs — Scan History and Zebra Scans. See Barcode scanning and batch verification.
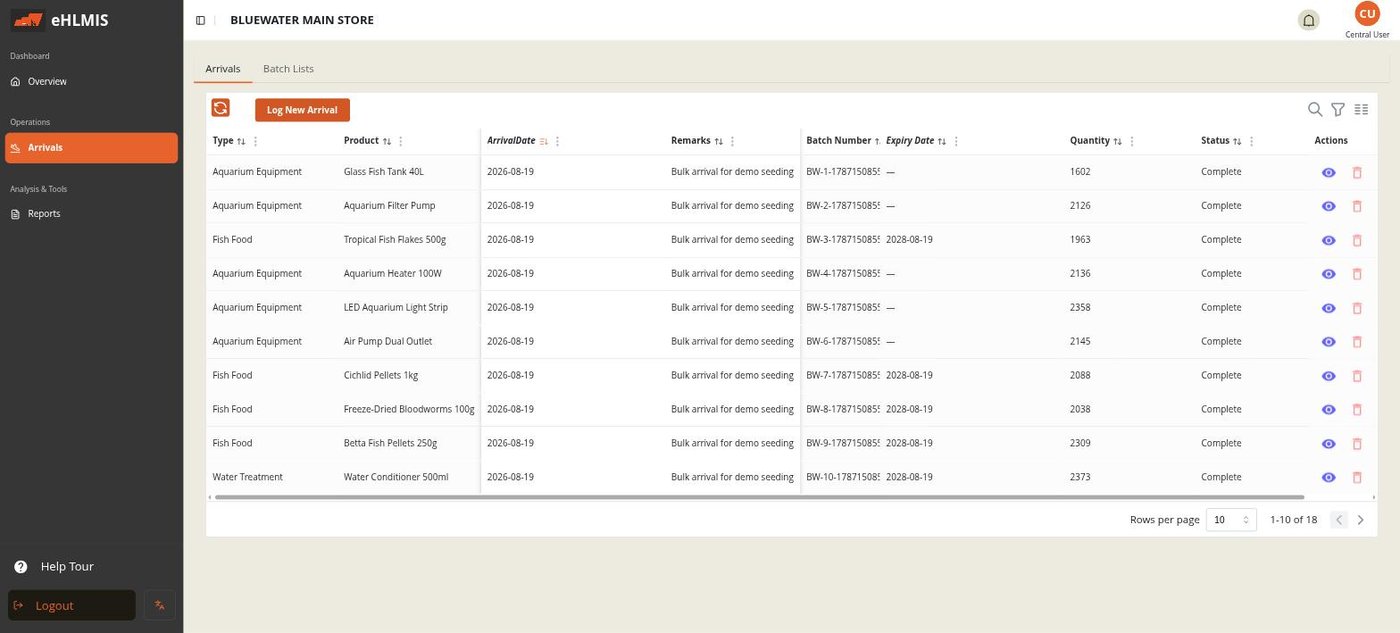
Batches come first
Every unit of stock in HLMIS belongs to a batch — a specific lot of a product, with its own batch number and (for products that track expiry) its own expiry date. Before you can log an arrival for a batch, that batch has to exist.
Creating a batch
On the Batch Lists tab, click Log New Batch:
| Field | Notes |
|---|---|
| Product Type / Product | What this batch is |
| Supplier | Who it came from (from Suppliers) |
| Batch Number | The lot number printed on the stock (at least two characters) |
| Expiration Date | Required. For products with expiry turned off, use the far-future or leave-as-configured value your deployment uses |
| (custom fields) | Any batch fields defined under Attributes — e.g. units per box |
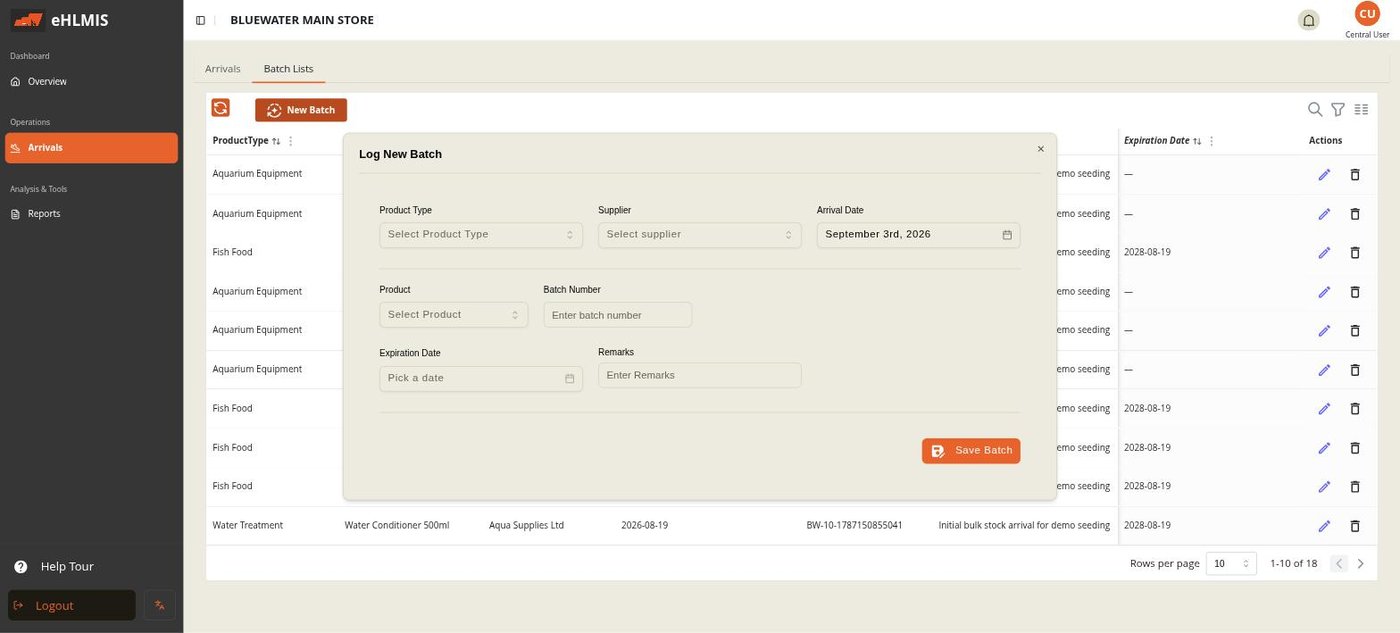
The Batch Lists table shows every batch with its product, supplier, arrival date, batch number, and expiry. Each row can be edited or deleted (with confirmation) — but delete is blocked once stock has moved against that batch.
Logging an arrival
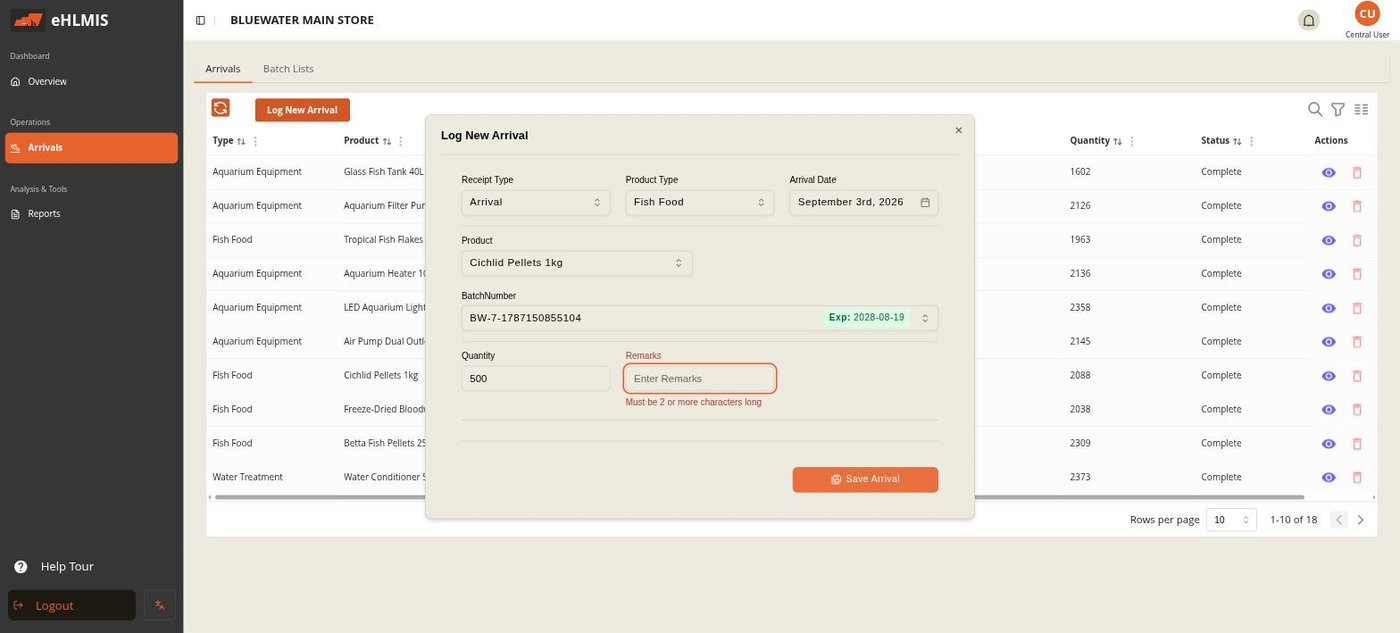
On the Arrivals tab, click Log New Arrival:
- Receipt Type — Arrival.
- Product Type, then Product.
- Arrival Date — when the delivery was received.
- Batch Number — pick the batch this delivery is for. (If it does not exist yet, create it on Batch Lists first.)
- Quantity received, and any Remarks.
- Any extra fields your deployment has configured for arrivals (shipment value, funder, partner…).
- Save Arrival.
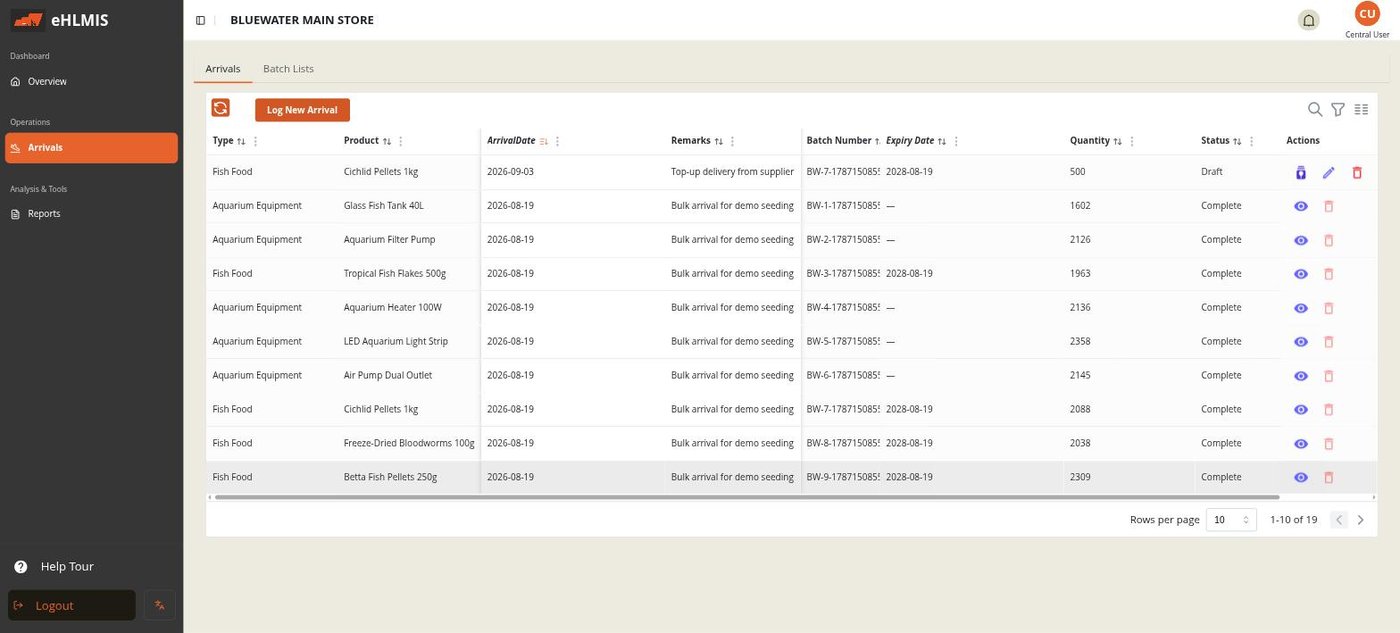
Draft, then post
A saved arrival starts as a Draft. It does not affect stock yet. While it is a draft you can:
| Action | |
|---|---|
| Post batch | Commits the arrival — the quantity is added to your main store's stock for that batch. This cannot be undone. |
| ✎ Edit | Correct any detail |
| 🗑 Delete | Remove the draft entirely |
Once posted, the arrival is Complete — it can only be viewed, not edited or deleted. The stock is now on hand and can be distributed down the hierarchy.
Barcode scanning and batch verification
Barcode scanning and verification appear only when TRVST is enabled under Maintenance → Settings → TRVST, and only on the Arrivals screen. An administrator can turn TRVST on or off at any time; doing so reloads the app and the scanning UI, the Get Product Data button, and the Scan History / Zebra Scans tabs appear or disappear accordingly.
Scanning a barcode
HLMIS reads the GS1 DataMatrix printed on a carton or pack. There is no camera or phone-camera scanning — you need a hardware scanner, in one of two setups:
- A USB or Bluetooth "keyboard-wedge" scanner pointed at the computer showing the Arrivals screen. Open the Arrivals screen, click somewhere that is not a text field (the scanner is ignored while a field has focus), and scan. The scanner must be configured to send an Enter / carriage return at the end of each scan, and the barcode must be at least 8 characters.
- A networked Zebra handheld running the ScanBridge app, which sends each scan to HLMIS over the network. The scan lands in whatever Arrivals screen is currently open — it can be a different computer or tablet from the one holding the scanner.
A successful scan reads the GS1 fields — product code (GTIN), batch / lot number, production date, expiry date, and serial number if present — pre-fills the Log New Batch form with them, and switches to the Batch Lists tab. A serial number means you scanned a single pack; no serial means the code covers a whole batch.
If HLMIS cannot read the code cleanly, a Barcode Scan Error dialog lists each field that failed (for example invalid expiration date, GTIN requires batch or lot number) and nothing is pre-filled.
The Log New Batch form straight after a GS1 scan: GTIN, batch number and expiry filled in, the serial-number banner, and the Get Product Data button.
Verifying against TRVST
With the batch form pre-filled, click Get Product Data. HLMIS asks the TRVST service about that product and records the result against the batch:
| Result | Meaning |
|---|---|
| Match | TRVST recognises this batch (or pack) |
| Expired | TRVST reports it as expired |
| No match | TRVST does not recognise this batch or pack |
| Not verified | TRVST could not give a definite answer |
HLMIS decides on its own whether to run a batch-level or pack-level check, based on whether a serial number was scanned — there is a single button, not one per level. Any warning or message text TRVST returns is shown and stored with the batch. A No match or Expired result does not block you from recording the arrival, but it is a signal to inspect the delivery before you post it.
The batch form showing a returned status (Match / No match / Expired) and any warning text from TRVST.
The first TRVST check from a given browser asks for location permission.
Allowing it sends the device's coordinates with each verification; denying
it still works but sends 0, 0. Clearing the browser's storage makes TRVST
treat the machine as a new device.
History tabs
- Scan History — every TRVST verification: batch number, product code, the TRVST result code and status, any warning text, expiry, and product name.
- Zebra Scans — the raw scan log: the scanned text, the device, who scanned, and when.
The Scan History tab on the Arrivals screen, with a few verification rows and their statuses.
Capturing serial numbers when stock is issued (rather than received) is not in the HLMIS interface — that part is handled in the backend only.